Upstairs in our home there were two bedrooms. One wasn't in too bad of shape outside of being the only area upstairs with carpet and of course the paint colors were awful. The other room, however, was hideous. It was very 70's looking to us with the wood paneling, dropped ceiling and dark built in cabinetry with peach paint on the trim. Oddly enough, however, in talking with our neighbors that have lived next door for 35+ years, they told us that the owner that lived here for most of the home's life actually remodeled that room at some point in the 50's for his daughter. None the less, there was no doubt in our minds that the upstairs needed to be our next project.
My husband had a plan, and I went along for the ride. I fully admit that I have trouble visualizing rooms as they will look when they are complete. He told me that he wanted to knock out the wall between the two and put in pocket doors between them so that when they were closed we would still have two bedrooms upstairs but when they were open it would make for a large master bedroom with our bed area on one side and a sitting area on the other. Although I couldn't visualize the end result, I trusted his judgement.
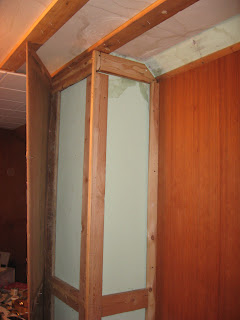
The first step was to begin removing the cedar paneling. Before he started removing it, he was very worried that we would have to drywall the whole room because if you pushed on the paneling it would flex as if there was nothing behind it. As he started to pull the panels down, much to our surprise, he found that they had fully re-framed the entire room on top of the original plaster walls. After getting all of the paneling down he began to remove the framing. There were several cracks in the wall, and removing the framing left some damage as well, but all of this seemed to be repairable. We were very excited that we would be able to maintain the plaster and have both rooms match.
The next step was removing the wall between the two rooms. For those that have removed plaster walls, you know how incredibly dusty and messy that can be. Oh what a mess it was up there! But eventually the wall was out.
At this point he started to build the pocket doors. We didn't want to just buy a kit, because it was very important to us that they look original to the home. So we hit up our local Habitat for Humanity salvage yard to find doors that matched the doors in the rest of our home. We found two doors that were perfect for the project, they just needed to be trimmed slightly to work for the project. He then set up the inner mechanics and installed the doors.
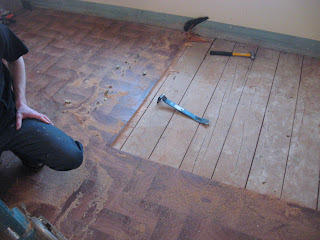
Once the pocket doors were framed in and complete, we started to call around to our local floor dealers to find hardwoods that would match the originals. We were very happy to find the same 1 1/2 width oak flooring that we needed. Installing them took some time due to the narrow width, but it was definitely worth it in the end to have them match so well.
Next up, we decided that it would be smart to take advantage of the extra space in the eves of the house. The bedroom has approximately 4 foot knee walls, so the eves were not originally accessible. My husband cut in two access doors, one in each room, in order to take advantage of this for storage. When cutting the hole in one side, he was shocked to discover a poster tacked up in there behind the plaster. It was a poster of Madonna. We have heard that people did this to bless their house and watch over them. So we were sure to secure the poster and leave it in it's original location.
We both love Craftsman style homes with the built in's and woodwork, so we decided to install some wainscoting and also create a built in where there was previously a different built in work area. The new built in would be used for storage as well as a spot to place a TV in our sitting area.
And finally it was time to paint the rooms. We chose a cream white trim with Restoration Hardware Silver Sage. We have a friend who is a painter by trade so we asked him to do the work. He is all about quality and attention to detail, so he hand brushed the whole room. The wainscoting with all of it's detail took some time to paint but it turned out beautiful. Not a stitch of tape used and every edge was cut in beautifully.
The finishing touch was lighting. The lighting in the rooms when we first moved in was awful. Nothing original to the home up there. So we went antiquing to try to find the perfect lights. While at a local lighting shop we were trying to find something very specific that we had in our heads and weren't having much luck. One of the employees at the lighting shop came by to see if he could help us. As we looked at what they had and described what we were hoping for, he informed us that he actually had something that sounded exactly like what we wanted in his own home. And they were a matching pair. Lucky for us, he was willing to sell them. We decided it was destiny because the guy actually works in the shop for the lighting store and doesn't normally go out on the floor. He was just filling in that day by chance. We ended up going by his house the next day to buy them and they were perfect. We put one in each bedroom and they looked great. Now we just needed one similar but not necessarily identical for the entry way outside the bedrooms. We were lucky enough to find one at a local antique store and they were willing to give us a great deal on it.
The lights in the bedroom had a very unique dark finish to them, so my husband even took the time to chemically treat the hardware in those rooms so that it would match the metal in light fixtures. It turned out beautiful.


No comments:
Post a Comment